
You’ve got an electric golf cart, right? And it’s not quite hitting the speeds you’d like. You’ve heard whispers about removing the speed limiter, and you’re curious. Can it be done? Is it safe? What are the risks? I get it. We’ve all been there, wanting just a bit more oomph from our ride. But here’s the thing – those speed limiters aren’t just there for fun. They’re about safety. Now, I’m not saying you can’t tweak things a bit.
So, if you’re thinking about tinkering with it, you need to be aware of the risks. Don’t worry, we’re going to give technical aspects of removing the speed limiter on your electric golf cart, providing you with a detailed guide to safely achieve your desired speed.
Why Do Electric Golf Carts Have Speed Limiters?
The primary reason for having speed limiters on electric golf carts is safety. Golf carts are often used in environments like golf courses, parks, and residential communities where high speeds could pose a risk to pedestrians and other vehicles. Moreover, golf carts lack the safety features found in regular cars, such as airbags and seat belts, making high-speed accidents potentially more dangerous.

Another reason is the preservation of battery life. Higher speeds drain the battery faster, reducing the range of the cart. By limiting the speed, the cart’s battery life is extended, allowing for longer periods of use between charges.
Lastly, legal regulations in many areas also limit the speed of electric golf carts. These laws are in place to ensure the safety of both golf cart drivers and the public.
The Impact of Speed Limiter Removal on Golf Cart Performance

1. Speed vs. Battery Life: What You Need to Know
When it comes to electric golf carts, speed, and battery life are two sides of the same coin. As you increase the speed of your golf cart by removing or adjusting the speed limiter, you’re also increasing the demand for the battery. This can lead to a decrease in the overall battery life of your golf cart.
In essence, the faster you go, the more energy you use. This means that your golf cart’s battery will drain faster, reducing the distance you can travel on a single charge. It’s a trade-off that you need to consider carefully.
Remember! A well-charged battery ensures that the whole system is working at an optimum level during the process of speed limiter removal or adjustment. So, if you’re planning to increase your golf cart’s speed, make sure to keep an eye on the battery life and plan your rides accordingly.
2. How Speed Limiter Removal Affects Torque
Torque is the force that helps your golf cart climb hills and accelerate. When you remove or adjust the speed limiter on your golf cart, you’re not just affecting the top speed; you’re also potentially affecting the torque.
In some cases, increasing the speed can lead to a decrease in torque. This means that while your golf cart might be able to reach higher speeds on flat surfaces, it might struggle when climbing hills or carrying heavy loads or may be toppled.

Note: some modifications can lead to an increase in both speed and torque. This depends on the specific make and model of your golf cart, as well as the type of modifications you’re making.
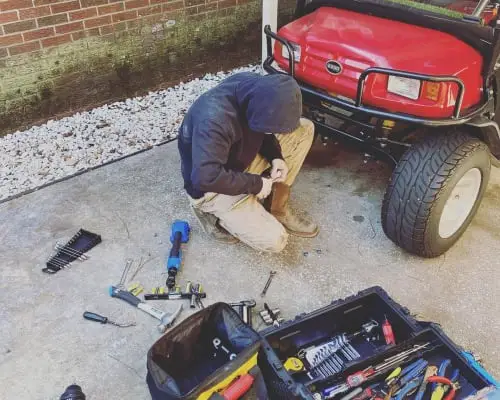
Preparing Your Electric Golf Cart for Speed Limiter Removal
Before you dive into the process of removing the speed limiter on your electric golf cart, it’s crucial to prepare your cart and gather the necessary tools. This preparation phase ensures a smooth and safe process, reducing the risk of any mishaps.
1. Essential Tools for Speed Limiter Removal
To remove the speed limiter on your electric golf cart, you’ll need a few essential tools. These include:
1. Safety goggles – These will protect your eyes from any debris or particles that may fly up while you’re working on your golf cart.
2. Wrench set – You’ll need this to disconnect the battery and possibly adjust certain parts of the golf cart.
3. Screwdriver set – This will be used to remove the speed limiter assembly.
4. Wire cutters – These are necessary for disconnecting the wires that connect the speed limiter to the rest of the golf cart’s electrical system.
5. Voltmeter – This tool is used to check the voltage of the speed limiter assembly before removing it.
2. Safety Measures Before Starting the Process
Safety should always be your top priority when working on your golf cart. Here are some safety measures to keep in mind:
1. Always wear safety goggles to protect your eyes from any debris or particles that may fly up while you’re working.
2. Disconnect the battery before starting any work on your golf cart. This will prevent any electrical shocks or accidents.
3. Be careful when removing the speed limiter. You don’t want to cause any damage to the golf cart’s electrical system.
4. Label the wires you disconnect. This will ensure that you can quickly reconnect them later.
5. When reconnecting the battery, make sure to tighten the cables securely. You don’t want them to come loose while you’re driving your golf cart.
How to Remove Speed Limiter from Your Golf Cart | Step-by-Step Guide!

This guide is designed to help you understand the process of removing the speed limiter on an electric golf cart. As always, please consult with a professional if you’re unsure about any steps.
1. Disconnecting the Battery | The First Step
The initiation of the process is straightforward but vital: disconnecting the battery. This not only ensures your safety but also protects the electric components of your golf cart from accidental damage. To do this:
1. Identify the main battery compartment, typically located under the seat.
2. Locate the battery terminal and disconnect the cables, starting with the negative one (usually black).
2. Locating and Adjusting the Speed Limiter
The speed limiter can typically be found near the golf cart’s motor or inside the controller box. This might vary slightly based on the model of your cart. Here’s how to adjust it:
Locate the speed limiter. It is often a screw or knob on the motor or inside the controller box.
Adjust the speed limiter. To increase speed, turn the screw counterclockwise or the knob towards the higher number (if applicable).
Tip! Make minor adjustments and test each time to avoid over-adjusting, which could potentially damage the motor.
3. Reconnecting the Battery and Testing Your Golf Cart
Finally, reconnect your battery and test your golf cart to verify if the speed has increased. Follow these steps:
1. Reconnect the battery cables, starting with the positive one (usually red).
2. Turn on your golf cart and test the speed at a safe location.
Remember, safety should be your number one priority. Increasing speed may require additional safety measures, such as installing seat belts or upgrading brakes.
Before making any adjustments, be sure to consult the manufacturer’s manual for your specific golf cart model. Removing the speed limiter may also impact the warranty, so check your warranty details before proceeding.
Speed Controller Adjustments for Different Golf Cart Models
Let’s review this for different models, focusing strictly on the essentials.
1. Electric Club Car Models
Yet, its standard speed setting can be underwhelming. To remedy this, start by locating the speed controller under the seat and looking for the speed setting switch. Switch it from ‘Tow’ to ‘Run’. Then, using a specialized wrench, turn the adjustment screw clockwise to increase the speed. It’s crucial to do this carefully to prevent any potential damage.
2. E-Z-GO Models

For this model, an aftermarket speed controller is often the way to go. After the installation, use a handheld programmer to customize the speed settings to your preference. Please note that this process requires some mechanical know-how, so consider professional assistance if you’re unsure.
Yamaha Models
This model has a sealed controller unit. To adjust the speed, an electronic speed upgrade kit will be required. Once installed, the kit allows you to modify the controller settings using a compatible device like a smartphone.
Wrap Up!
The allure of unlocking faster speeds on your electric golf cart can be enticing, but it’s essential to consider the implications carefully. Speed limiters exist for safety reasons and to preserve battery life. Removing or adjusting these can affect not only your cart’s top speed but also torque and battery longevity.
The process varies across different models like Club Car, E-Z-GO, and Yamaha, and requires a certain level of technical expertise. In some cases, professional assistance may be necessary. Above all, remember that safety should be your paramount concern when making such adjustments. So, give your golf cart the speed boost it needs, but do it wisely and responsibly.
Now that you’ve safely increased your golf cart’s speed, why not explore some fun activities to do on a golf cart?
FAQs
Will Removing The Speed Limiter Damage My Golf Cart?
No, removing the speed limiter won’t harm your golf cart if done correctly and safely. However, it can strain the battery and affect torque output. Be cautious to avoid damaging the cart’s electrical system.
Can I Re-Install The Speed Limiter If I Change My Mind?
Yes, you can re-install the speed limiter by reversing the removal process. But remember, incorrect reinstallation could potentially harm your golf cart.
Is It Legal To Remove The Speed Limiter On My Electric Golf Cart?
The legality of removing the speed limiter varies based on local regulations. Some areas may have speed restrictions for electric golf carts, so it’s crucial to check your local laws before proceeding with speed limiter removal.

Eliza Mercer, the renowned golf coach with unmatched expertise in the sport, is our Lead Instruction Coach. Eliza provides exclusive and personalized coaching sessions to help golfers of all levels improve their skills. With her wealth of knowledge and experience, Eliza is a valuable resource for readers looking to elevate their game. Join Our Team!