

The chair is not a place to hide. It is the most reliable piece of gym equipment in your home.
When you notice that getting out of the car or standing up from the dinner table takes more effort than it did five years ago, your body is sending you a specific signal. You are dealing with a natural decline in muscle fiber recruitment, but you are not stuck with it. By transforming your sturdy dining chair into a training bench, you can target stability and leg strength without the risk of an unassisted floor fall.
This guide gives you six foundational movements designed for the over-70 body, stripping away the complexity so you can focus on regaining the independence you value most.
Separating Fact from Fiction
Why Your Chair is a Tool, Not a Rest Stop

Muscle responds to loading at 70 exactly as it does at 30. The difference is that your recovery timeline is longer, and your joints have more mileage.
Functional fitness is the ability to do the things you want to do: carrying the groceries, stepping over a curb, or getting into a low seat at a restaurant. When you perform resistance movements in a chair, you are training the specific neuromuscular patterns required for those exact tasks. You are not building 'gym strength' that has no application; you are building 'life strength' that keeps you mobile.
Start with a chair that does not roll or swivel. A standard, four-legged wooden or metal kitchen chair is ideal because it provides a stable base that will not slide when you apply force through your heels.
💡 PRO TIP
The Stability Scale
Before you begin, ensure you can sit comfortably for 30 minutes without needing back support. If you have sharp joint pain or recent abdominal surgery, consult your physician before starting any resistance protocol.
The Science of Seated Strength

After 70, your body processes protein less efficiently, a condition called anabolic resistance. This means you have to work harder to signal your muscles to hold onto their mass.
Resistance, even in a chair, provides the mechanical tension necessary to trigger muscle protein synthesis. When you sit at the edge of your seat without leaning back, you force your transverse abdominis and deep spinal stabilizers to engage constantly. This is not just 'sitting'; it is active stabilization that protects your spine and improves your posture.
These movements are low-impact by design. They protect your cartilage while giving your muscles the work they need to stay responsive.
Hierarchy of Movement
1. Seated Marching

You reach the top of the stairs and your hip flexors feel heavy. This move builds the endurance needed to lift your feet clear of curbs and steps.
Sit on the edge of your chair, keeping your spine neutral. Lift one knee toward the ceiling as high as is comfortable, then lower it slowly with control.
The protocol: 2 sets of 10 lifts per leg. Do not lean back as you lift; if your back touches the chair, you are cheating the core engagement.
2. Chair Squat-to-Stand

This is the gold standard for independent living. If you can master this, you can navigate your own home for years to come.
Place your feet hip-width apart. Lean your chest forward—nose over toes—and drive through your heels to stand up fully, then control the descent back down.
The protocol: 3 sets of 8 repetitions. If this feels too difficult, place a sturdy pillow on the seat to raise your starting height, making the distance shorter.
💡 Tip: Keep your knees in line with your toes. If they collapse inward, widen your stance slightly to engage the glutes better.
Chair Squat: Form Check
Do This
- Chest forward, nose over toes
- Drive through heels
- Control the descent (3 seconds)
- Stand up fully
Don't Do This
- Curving the spine
- Rocking to gain momentum
- Letting knees cave inward
- Falling back into the seat
3. Seated Torso Twists

Spinal stiffness is often mistaken for back pain. Creating rotation through the thoracic spine helps you look over your shoulder when backing up the car.
Sit tall, cross your arms over your chest. Rotate your ribcage to the right, pause, then rotate to the left.
The protocol: 10 slow rotations per side. Focus the movement on your ribs, not your neck; your head should simply follow the line of your chest.
4. Seated Leg Extensions
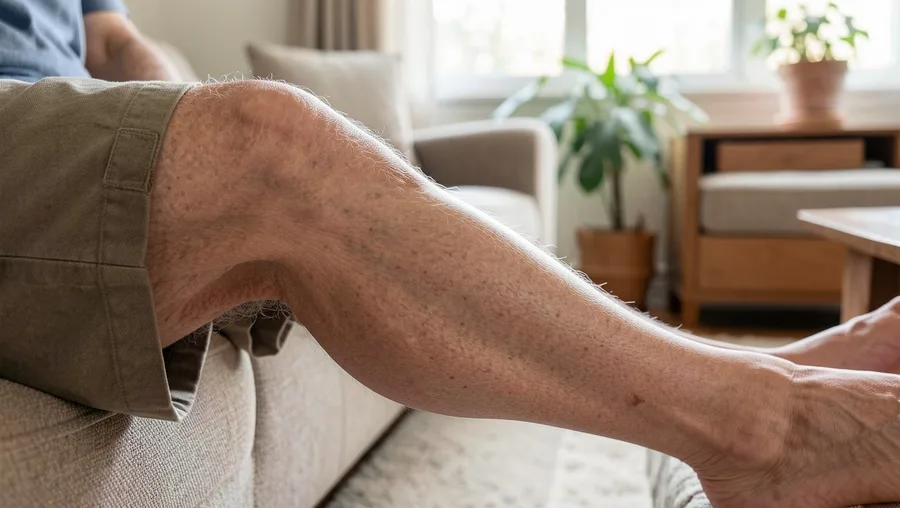
Your quadriceps are the primary shock absorbers for your knees. Strengthening them is the best insurance policy against knee pain.
Extend one leg out until it is straight. Squeeze the muscle on top of your thigh hard for three seconds, then lower it.
The protocol: 2 sets of 12 extensions per leg. Keep your toes pointed toward the ceiling to ensure you are engaging the full length of the quad muscle.
Leg Extension — At a Glance
⏱️ Hold Time
3 seconds
💪 Targets
Quadriceps
⚠️ Skip If
Sharp knee pain
📅 Frequency
3x a week
Mechanism
Isolating the quadriceps strengthens the stability of the knee joint.
5. Seated Arm Circles and Presses

You do not need a gym membership to keep your shoulders mobile. Overhead movement is one of the first things to go when we stop reaching.
Extend your arms out to the sides. Make small, controlled circles for 30 seconds, then transition into a slow overhead press.
The protocol: 2 minutes of continuous movement. Keep the movement controlled; it is the tension, not the speed, that builds shoulder health.
6. Ankle Pumps and Circles

Your ankles act as the base of your balance. If they are tight, your entire gait changes, often leading to stumbling.
Extend your legs slightly. Flex your toes toward your shins, then point them away. Follow this with ten slow circles in each direction.
The protocol: 1 minute per session. This is excellent for circulation and can be done while watching the evening news.
Top Picks for Your Goals
When to Push and When to Rest

Muscle fatigue feels like a dull, heavy ache in the muscle belly. This is exactly what you are looking for.
Sharp, stabbing pain in a joint is the body telling you to stop. If you feel this, do not attempt to 'work through it.' Consult a physical therapist to identify if a specific joint structure is being irritated.
Consistency is more valuable than intensity. Aim for two to three sessions per week. Your muscles need 48 hours of recovery to repair the fibers you just stimulated.
📅 Your First 30 Days
Week 1: Fundamentals
Focus only on form; 5 reps per move.
Week 2: Habit Building
Establish 3 days a week; 8 reps per move.
Week 3: Progressive Load
Slow the tempo; 10 reps per move.
Week 4: Mastery
12 reps per move; full focus on quality.
Your Weekly Routine
Questions That Come Up Often
Do these replace a daily walking program? No, they complement it. Walking provides cardiovascular work, while these build the structural integrity required to walk without pain.
What if I have lower back pain? Stick to movements that keep your spine neutral. If a move requires leaning, skip it or modify it until you can keep your back flat.
Do I need special gear? Only a non-rolling chair. A sturdy wooden kitchen chair is the safest choice for every move on this list.
Best For
The Transformation
Your Daily Chair Routine for Long-Term Mobility
You do not need a weight room to maintain your strength. You need a chair, a plan, and the willingness to show up on the days you do not feel like it.
Bookmark this page and return to it whenever your progress feels stuck. Consistency is your greatest asset in preserving your independence, so start with today’s session and keep going.

Meet Edward Green, the founder of GolfingGoal and a seasoned expert in golf. With years of experience on the course and a passion for the sport, Edward has a wealth of knowledge to share. As our Lead Writer, he contributes articles, tutorials, and resources to help readers to improve their skills and reach their full potential on the golf course. Join Our Team!