
Storing your golf cart for the off-season? It’s vital to disconnect the batteries successfully to keep away from damage and ensure a smooth start-up when you’re equipped to hit the greens once more.
This manual is your move-to aid for safely disconnecting and storing your golfing cart batteries.
We’ll walk you through every step, from removing the bad terminal to storing the cart properly. No extra guesswork or issues about battery mishaps.
Get prepared to master the art of golfing cart battery garages conveniently and confidently! 🏌️♂️🔋🛠️
Identifying the Right Tools for Battery Disconnection

Here’s a list of essential tools and some tips to keep in mind:
1. Wrench Set
You will usually need a wrench to loosen and remove the battery cap. Sizes can vary, so an adjustable key or open key set is convenient.
2. Battery Terminal Puller
This tool is a lifesaver if the terminals are stuck and not easy to get out. This helps to remove the terminal without damaging it.
3. Wire Brush
Over time, terminals can deteriorate. A wire brush is perfect for corrosion cleaning and ensuring good connections when recharging batteries.
4. Voltage Meter/Multimeter
Before you start, it’s wise to check the battery’s voltage. A multimeter can also help diagnose any potential issues with the battery.
5. Rubber Gloves and Safety Glasses
Safety first! Batteries contain acids and can produce explosive gases. Rubber gloves protect your hands, and safety glasses shield your eyes from any accidental splashes or sparks.
6. Battery Hydrometer (for lead-acid batteries)
If you’re dealing with lead-acid batteries, a hydrometer can check the specific gravity of each cell, indicating its health and charge level.
7. Battery Terminal Protector Spray
After cleaning and before reconnecting, use this spray to protect the terminals from corrosion.
8. Torque Wrench
When reattaching the terminals, it’s crucial not to overtighten them. A torque wrench helps you observe the proper quantity of pressure.
Safety Precautions When Disconnecting Golf Cart Batteries

1. Wear Protective Gear
Always, and I mean always, wear gloves and safety goggles. You’re dealing with batteries here, not baking cookies! This gear will protect you from acid spills and sparks.
2. Disconnect the Right Way
Start by removing the negative terminal first. It’s usually marked with a minus (-) sign. Why negative first? It reduces the risk of short-circuiting. Trust me, you don’t want sparks flying!
3. Use Proper Tools
A wrench is your high-quality pal here, however, ensure it’s the right size. A free wrench can slip and reason a spark, and that is a no-go.
4. Keep Metal Objects Away
Rings, bracelets, watches – leave them at home. Metal and batteries? Not a great mix. They can create a short circuit and, yep, more unwanted sparks.
5. Check for Gas
Batteries can release flammable hydrogen gas. So, if you smell something funky or suspect gas, ventilate the area before you start. Safety first!
6. Avoid Direct Contact
Battery acid is no joke. If you need to handle the battery, do it with care and keep it upright. Acid spills are bad news.
7. Inspect for Damage
Before you disconnect, take a good look at the battery. Any cracks or leaks? If yes, handle it with extra caution. Damaged batteries can be unpredictable.
8. Keep a Neutralizing Solution Handy
Accidents happen. If battery acid spills, be ready with a baking soda and water solution to neutralize it. Better safe than sorry!
9. Store Batteries Properly
Once disconnected, store your batteries in a cool, dry place. Extreme temperatures? Not good for battery life.
10. Regular Checks
Even in storage, give your batteries a once-over now and then. Look for corrosion or any other signs of trouble.
Step-by-Step Guide to Disconnecting Golf Cart Batteries for Storage

1. Safety First
Before you start, ensure your golf cart is turned off and parked on a stage floor. Safety glasses and gloves are a clever move to defend yourself.
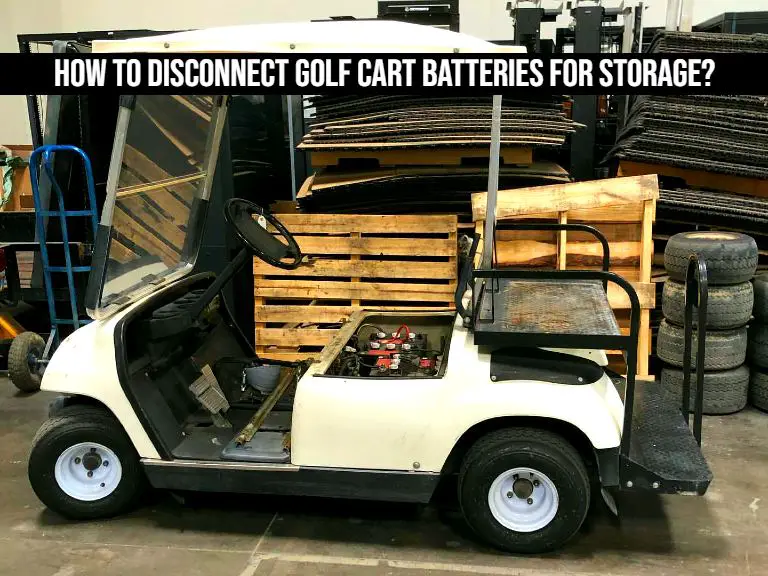
2. Locate the Batteries
Pop open the seat or the designated battery compartment to get to the batteries. It’s usually straightforward, but hey, every cart’s a bit different.
3. Begin with the Negative Terminal
Always start by disconnecting the negative terminal (it is the black one). This reduces the threat of electrical shorts. Use a wrench to loosen the nut and remove the cable.
4. Move to the Positive Terminal
Next up, is the positive terminal (the red one). Same drill – loosen the nut and remove the cable. Keep these cables away from metal and each other to prevent any sparks or shorts.
5. Check for Corrosion
While you’re in there, take a short search for any corrosion on the terminals. If you notice any, clean it off with a mixture of baking soda and water.
6. Secure the Cables
Once both terminals are disconnected, secure the cables so they don’t touch anything, especially each other. You can use zip ties or just tuck them away neatly.
7. Cover the Terminals
It is advisable to cover the terminals with a non-conductive material, such as a terminal protector or even just some electrical tape. This helps prevent accidental collisions.
8. Store Your Cart Properly
Now that the battery is disconnected, store your golf cart in a cool, dry place. Avoid extreme heat and humidity, as it is not battery-resistant.
9. Battery Maintenance
If you store your cart for extended periods, consider using a charging device or charging the battery periodically. This keeps them in good shape and ready to roll when you have them.
Additionally, if you’re looking to further extend the life of your golf cart batteries, you might find our guide on how to rejuvenate golf cart batteries particularly useful.
It’s packed with tips and techniques to help you get the most out of your batteries.
10. Reconnecting
When it’s time to get back on track, reconnect the positive terminal first, then the negative. Tighten those nuts, but not too much – snug is good.
Troubleshooting Common Issues During Golf Cart Battery Disconnection
1. Stuck Terminals? Use a Terminal Puller
Sometimes, terminals can get corroded and stuck. Don’t force them off; use a terminal puller to gently remove them without causing damage.
2. Spotting Corrosion Early
Early Watch for any symptoms of corrosion at the terminals. If you spot any, clean them with a mixture of baking soda and water earlier than cutting them. This facilitates in preventing further damage.
3. Handling a Short Circuit

Catching a Short Circuit If you watch a short circuit, don’t panic. First, ensure all connections are turned off. Use a multimeter to check for continuity among the terminals. If there’s a short, it’s best to consult a professional.
4. Dealing with Swollen Batteries
Dealing with Swollen Batteries Swollen batteries may be a signal of overcharging or inner damage. If you notice this, it’s miles safer to update the battery than to try and keep it.
5. Avoiding Terminal Confusion
Always mark your cables before disconnecting. This helps you remember which cable goes where preventing accidental reverse polarity when you reconnect.
6. Proper Wire Handling
Be gentle when disconnecting wires. Pulling too hard can damage the connectors or the battery itself.
7. Battery Storage Location
Store your batteries in a cool, dry place. Extreme temperatures can damage them, so avoid places like a hot garage or a damp basement.
8. Regular Battery Checks
Even in storage, check your batteries periodically. Look for any signs of leakage or damage, and ensure they maintain a proper charge level.
Final Thoughts!
Disconnecting golf cart batteries for storage is more than just a routine task; It’s about preserving the life and efficiency of your golf cart.
This comprehensive guide has equipped you with the knowledge to disassemble and store your battery safely, ensuring it stays in top condition for your next golf season.
Remember that proper disassembly and storage not only increases battery life but also eliminates potential hazards. Let’s get our golf cart ready for action!

Eliza Mercer, the renowned golf coach with unmatched expertise in the sport, is our Lead Instruction Coach. Eliza provides exclusive and personalized coaching sessions to help golfers of all levels improve their skills. With her wealth of knowledge and experience, Eliza is a valuable resource for readers looking to elevate their game. Join Our Team!