

Rejuvenating your golf cart batteries isn’t just about saving money; it’s about bringing life back to your trusty ride. 🏌️♂️⛳️
With the right approach, you can transform those sluggish batteries into powerhouses, ensuring smooth rides on the greens.
This guide is your go-to resource for understanding the nuances of battery rejuvenation.
From mixing Epsom salts to maintaining water levels, we’ll cover the essential steps to get your golf cart batteries running like new. So, let’s get those batteries charged up and ready for action!
Signs Your Golf Cart Batteries Need Rejuvenation
1. Reduced Range
If your cart isn’t going as far on a full charge as it used to, the batteries might wear out.
2. Slow Performance
Noticeable sluggishness, especially on inclines, indicates battery fatigue.
3. Longer Charging Times
Batteries taking longer to charge fully can signal declining health.
4. Visible Corrosion or Swelling
Physical signs like terminal corrosion or battery case swelling are red flags.
5. Age Factor
Golf cart batteries typically last 4-6 years. If yours are older, they might need rejuvenation.
6. Voltage Drop
A significant drop in voltage right after a full charge suggests the batteries can’t hold a charge effectively.
7. Frequent Water Refills for Flooded Batteries
If you’re constantly topping up water in flooded batteries, it’s a sign they’re nearing the end of their lifespan.
Initial Steps in Rejuvenating Golf Cart Batteries
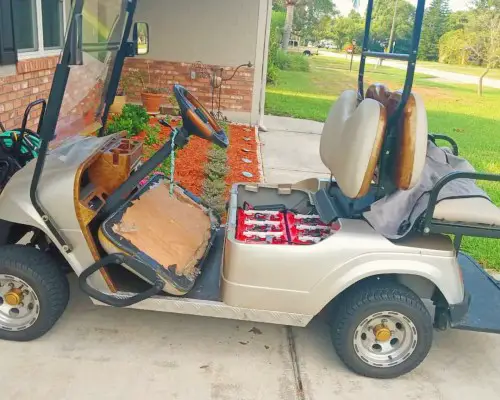
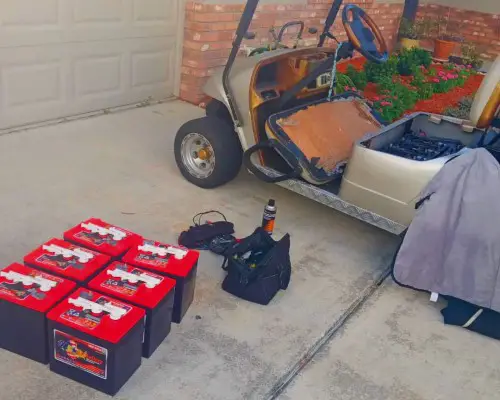
1. Safety Precautions and Necessary Tools
1. Wear Protective Gear
Always don safety goggles, gloves, and an apron. Battery acid can cause severe skin irritation and damage clothes.
2. Tools You’ll Need
Gather a battery charger, Epsom salts, baking soda, distilled water, a turkey baster, a flathead screwdriver, a wrench, and a wire brush or battery terminal cleaner.
3. Work in a Ventilated Area
Batteries emit gases; ensure adequate ventilation to avoid inhaling harmful fumes.
2. Assessing Battery Condition Before Rejuvenation
1. Check the Voltage
Use your voltmeter to get a reading on each battery. Healthy batteries should read close to their rated voltage (6V or 12V, typically). Significantly lower readings hint at a battery in need of rejuvenation.
2. Inspect for Physical Damage
Look for cracks, leaks, or bulges. If you spot these, it’s better to replace the battery. Safety first!
3. Terminal Inspection
Corroded terminals are a no-go. Clean them up with a mix of baking soda and water. A stiff brush will scrub away most grime and corrosion.
4. Age Matters
Batteries have a lifespan. If yours are pushing 5-6 years, rejuvenation might be a short-term fix. It’s like giving a Band-Aid to a guy who needs a cast.
5. Charge History
Batteries left discharged for long periods or frequently undercharged can suffer. This history affects their rejuvenation potential.
The Reconditioning or Rejuvenation Process Explained
1. How to Equalize Battery Cells (Step-by-Step Guide)
Over time, cells in a battery can become imbalanced, leading to reduced performance and lifespan.
This is especially true for golf cart batteries, which are often used intensively and then left idle.
Equalizing is essentially a controlled overcharge, performed to balance the voltage and specific gravity in each cell. It’s like giving your battery a “reset” to bring all cells to a similar level.
- Check Water Levels: Before starting, ensure each cell’s water level is adequate. Top up with distilled water if necessary, but don’t overfill.
- Set to Equalize Mode: If your charger has an equalization mode, set it to this. If not, a standard charge followed by a controlled overcharge can work.
- Monitor the Process: Keep an eye on the battery. You might notice bubbling or a slight increase in temperature. This is normal, but excessive heat or violent boiling isn’t.
- Testing Post-Equalization: After the process, use a hydrometer or voltmeter to check each cell. They should now show similar readings.
2. Using Epsom Salts for Battery Rejuvenation
Epsom salt (magnesium sulfate) is a well-known remedy for reviving old or weak lead-acid batteries. It helps to dissolve sulfate build-up on battery plates, enhancing conductivity and battery life.
- Epsom Salt Solution: Mix a high concentration of Epsom salt with warm, distilled water. A common ratio is 1 part Epsom salt to 3 parts water.
- Replacing Battery Electrolyte: Carefully drain the old electrolyte from the battery. Then, fill each cell with the Epsom salt solution.
- Recharge the Battery: Charge the battery slowly to allow the Epsom salt solution to work its way through the cell plates.
While not a guaranteed fix, many users report significant improvements in battery performance. However, it’s more of a temporary solution than a permanent fix.
For more insights, check out our guide on how to increase golf cart battery life, which offers valuable tips for extending battery performance.
Charging and Testing Post-Rejuvenation of Golf Cart Batteries
1. Proper Charging Techniques for Rejuvenated Batteries
1. Use the Right Charger: Always use a charger compatible with your battery type. Mismatched chargers can damage batteries.
2. Charge in a Well-Ventilated Area: Charging generates gases; ensure good ventilation to avoid buildup.
3. Avoid Overcharging: Overcharging can lead to overheating and reduce battery life. Use a smart charger that stops when the battery is full.
4. Monitor Temperature: Batteries should not get too hot during charging. If they do, stop charging and let them cool down.
5. Equalize Regularly: For flooded batteries, perform an equalization charge monthly to balance cell voltages and remove sulfate build-up.
6. Check Water Levels: For flooded batteries, maintain proper water levels with distilled water, especially after equalization.
7. Avoid Fast Charging: Fast charging can be harsh on batteries. Opt for standard or slow charging modes.
In your journey to maintain and rejuvenate golf cart batteries, you might come across various products claiming to repair or enhance battery life.
One such product is the golf cart battery repair liquid. Learn more about its effectiveness in our article on does golf cart battery repair liquid work.
2. Conducting a Load Test to Assess Battery Health
1. Fully Charge the Battery: Ensure the battery is fully charged before testing.
2. Use a Reliable Load Tester: A quality load tester gives accurate readings.
3. Apply the Load: Apply a load equivalent to half the battery’s CCA (Cold Cranking Amps) rating.
4. Monitor Voltage Drop: A healthy battery should maintain a voltage above 9.6 volts during the test.
5. Check Recovery Time: After removing the load, the battery should quickly return to its near-original voltage.
6. Repeat if Necessary: If results are borderline, recharge and retest to confirm.
7. Consider Battery Age: Batteries degrade over time. Even if a load test is passed, consider replacing batteries older than 5-6 years.
Final Thoughts!
Rejuvenating golf cart batteries is more than just a technical process; it’s about understanding the unique chemistry and behavior of these power sources.
While we’ve covered essential steps like equalizing cells and using Epsom salts, remember that each battery’s history and condition play a crucial role in the rejuvenation outcome.
Proper charging techniques and regular maintenance are vital for extending battery life.
If you’re still facing issues after trying these methods, it might be time to consider professional advice or replacement.

Eliza Mercer, the renowned golf coach with unmatched expertise in the sport, is our Lead Instruction Coach. Eliza provides exclusive and personalized coaching sessions to help golfers of all levels improve their skills. With her wealth of knowledge and experience, Eliza is a valuable resource for readers looking to elevate their game. Join Our Team!